Getting Started
In this getting started page article, we are going to cover everything including the installation, connection, and usage of the “WP Sync” plugin with Canva.com.
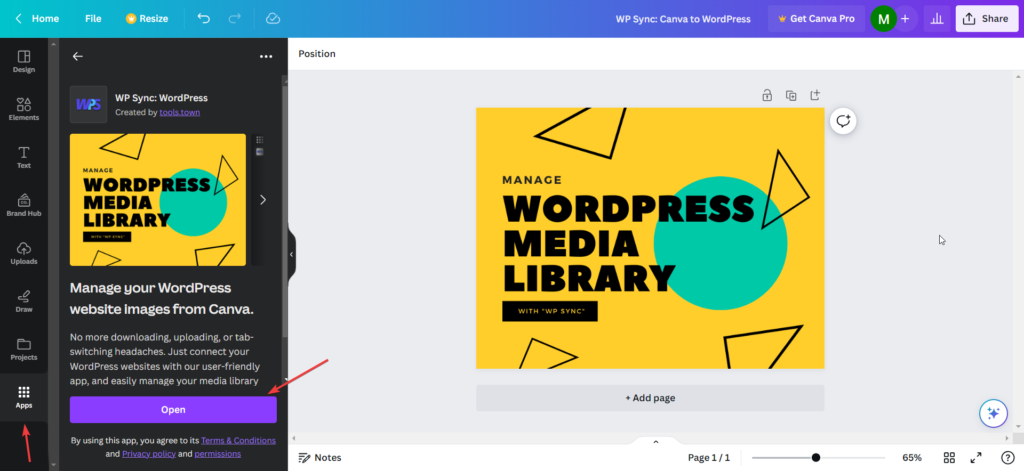
Add App in Canva Apps Add App in Canva Apps
First, you need to add the “WP Sync” app to Canva. To do this:
- Login to Canva.com
- Go to Apps
- Search for “WP Sync” and click on it.
You’ll see the screen something as below:
Done. After that you’ll see the “Begin Authentication” screen below:

Here, Just click on “Begin Authentication” to start the process.
Top ↑Authentication Authentication
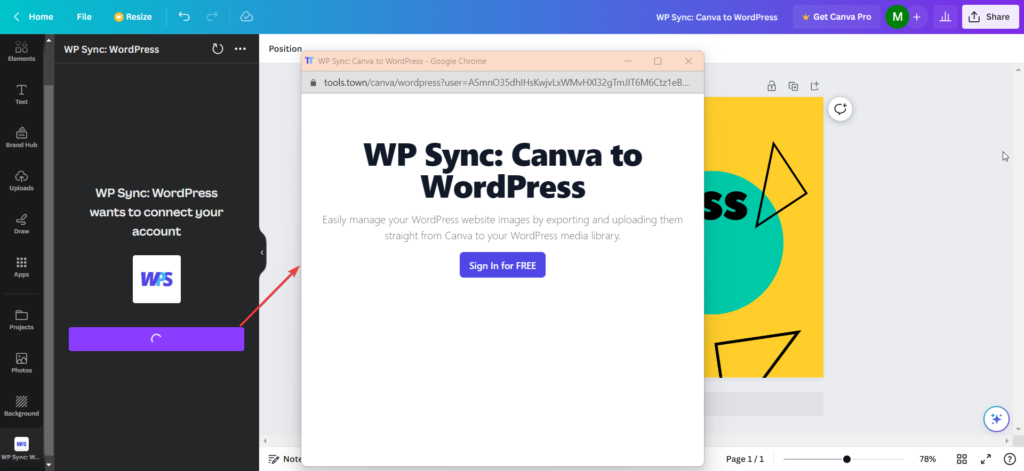
In the Authentication process, You see the connect screen something as below:

Here, Just click on the “Connect” button.
Create an Account Create an Account
After click on “Connect” you will see the popup something as below:
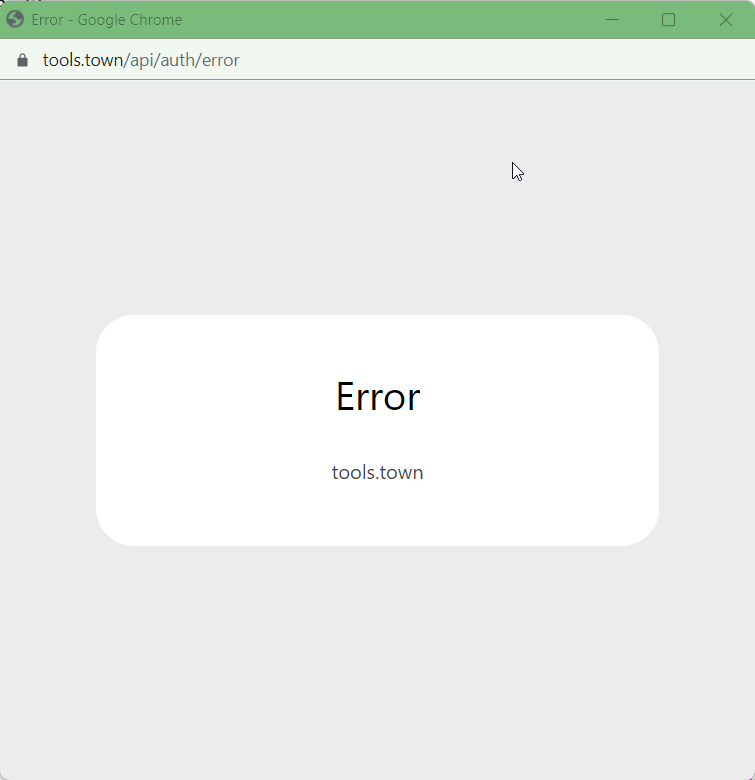
Note: Due to heavy traffic if you see the screen as below then just re-start the authentication process as above.
If you don’t see any error’s then you see the create account screen as below:
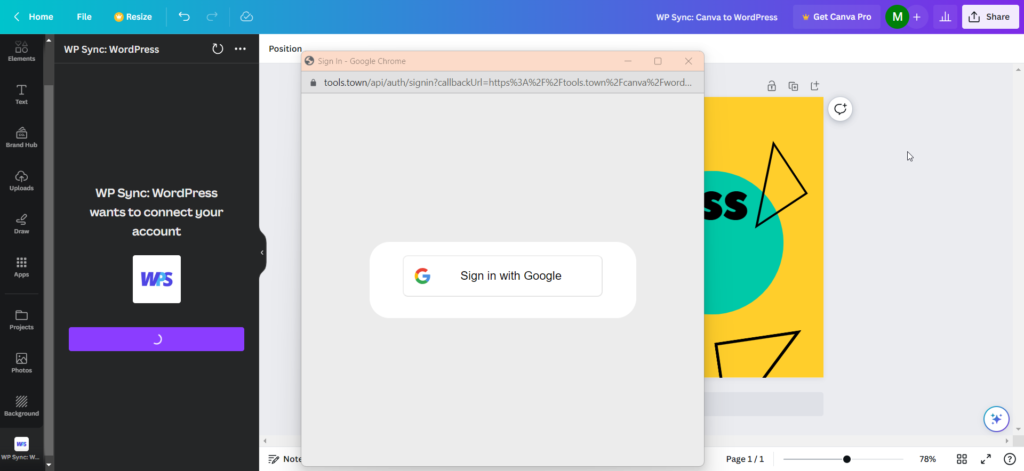
For now, We allow users to create accounts in tools.town website with “Sign in with Google”
In the future, we’ll add support for other platforms as well.
Okay. Let’s check further.
On click on the “Sign in with Google” you’ll see the currently logged in Google accounts list as below:
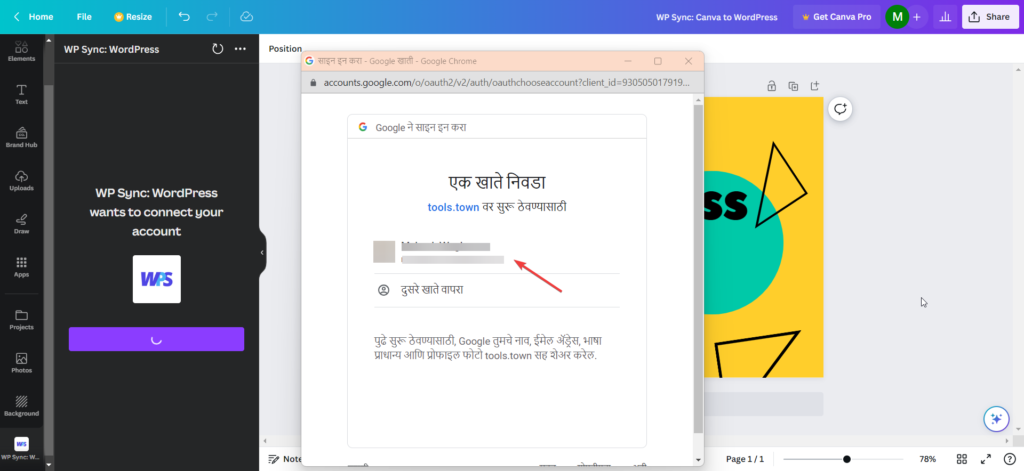
Click on the Google account which you want to create on tools.town.
After successful account creation you’ll see the subscription screen.
Don’t worry, We also love free subscriptions. So, we have a free subscription.
Top ↑Subscribe to Plan Subscribe to Plan
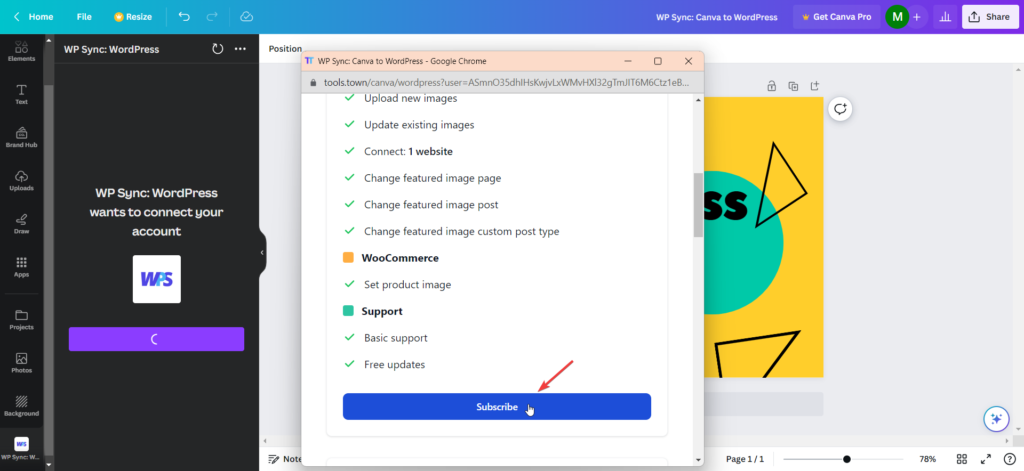
After create account you’ll see the screen something as below:

Here, You can subscribe as:
- Free – Connect 1 website
- Premium – Connect 5 websites
- Agency – Connect unlimited website
For more details about the subscription go to https://tools.town/canva/wordpress
Top ↑Subscribe as Free Subscribe as Free
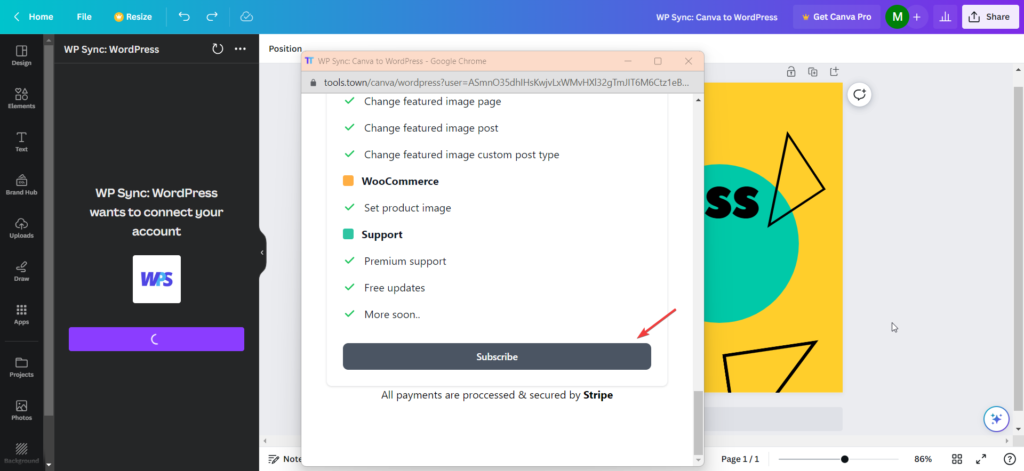
To subscribe for a free plan just click on the Subscribe button.
Or, You may subscribe for a Premium or an Agency.
Top ↑Subscribe as Paid Subscription Subscribe as Paid Subscription
To subscribe to a paid plan you can:
- Subscribe for Premium
- Subscribe for Agency
On click on the “Subscribe” button you will redirect to the Stripe checkout page as below:
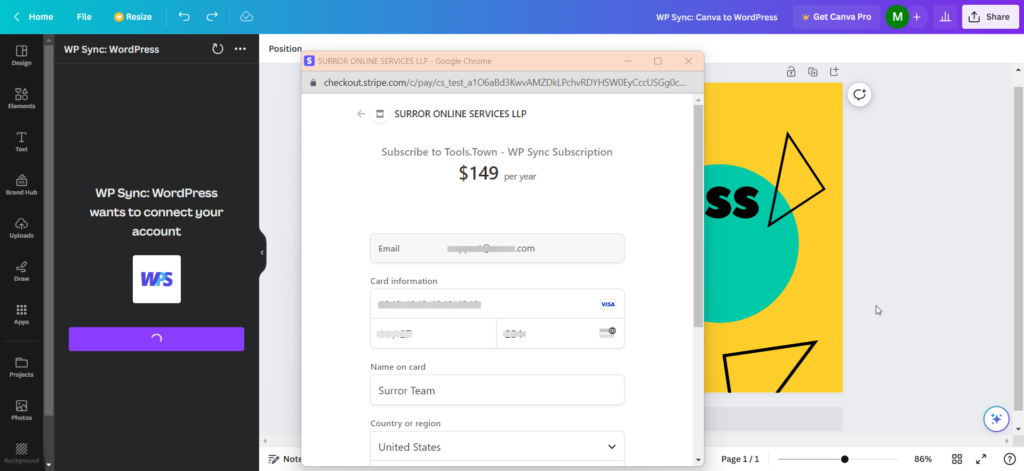
Fill in your personal details and simply purchase the plan.
Done. After a successful transaction, you’ll see the add website screen below.
Top ↑Add Website Add Website
Once, You subscribe as a free or paid user you can able to add the website.
Note: Free subscription allow only 1 website. Upgrade to Premium or Agency plan to add multiple websites.
To add the website you can see the screen below:

Now, To add the website you need to install the WordPress plugin WP Sync.
Top ↑WP Sync WordPress Plugin WP Sync WordPress Plugin
The “WP Sync WordPress Plugin”, allows you to connect your websites and manage them from Canva.
From the Canva app, you update/upload images. Those requests will send to your connected website.
And the WP Sync WordPress plugin manages it hassle-free.
Let’s see how to do it step by step.
Top ↑Download the WP Sync plugin Download the WP Sync plugin
You may see the screen as below:
Or, You may download the WP Sync WordPress plugin.
Top ↑Install and Activate Plugin Install and Activate Plugin
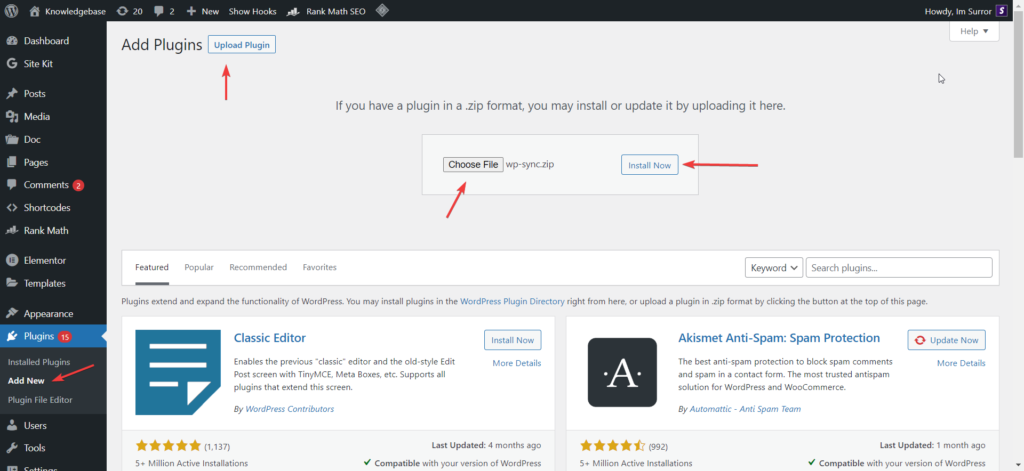
After downloading the plugin, same as other plugins, just upload it to your WordPress website which you want to connect to Canva.
In this example, I’m using our docs website https://docs.surror.com/.
- To install the plugin, Go to Plugins > Add new > Upload Plugin
After install, just click on “Activate Plugin” button as below:
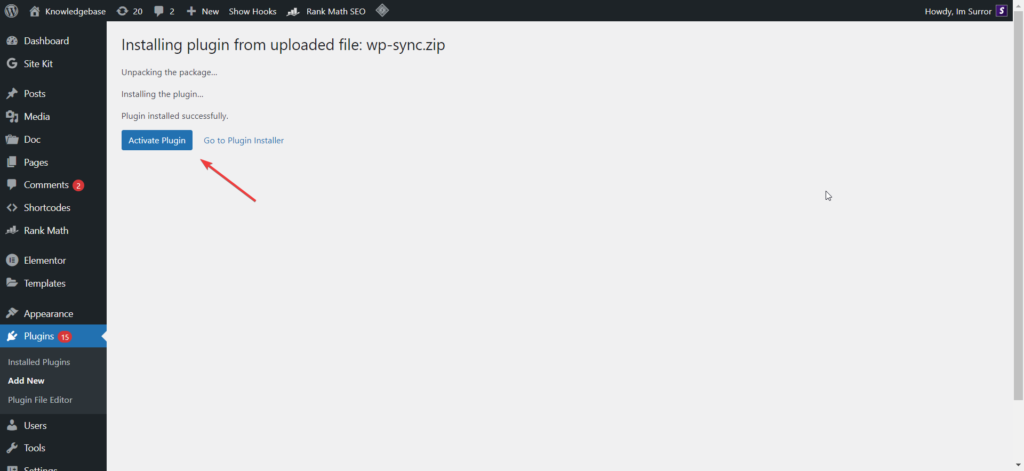
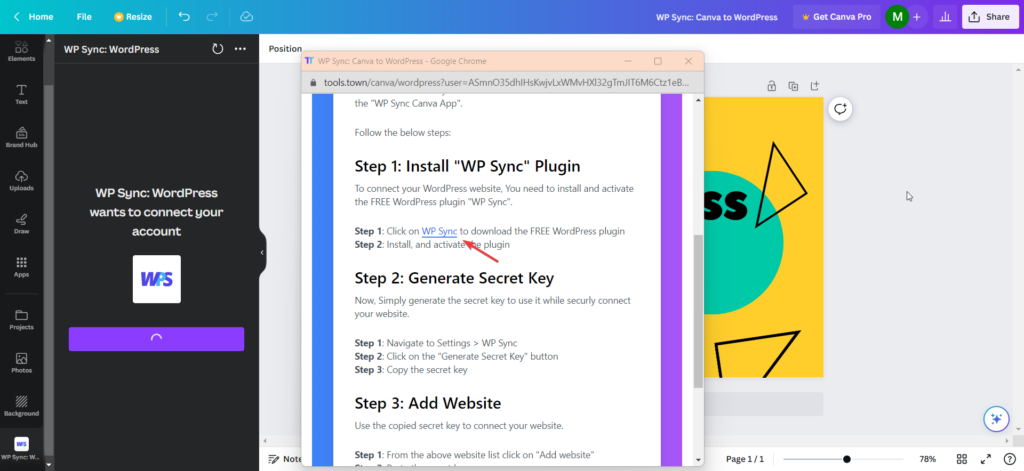
Great. Now, Generate the secrete key to connect your website securly.
Top ↑Create a Secret Key Create a Secret Key
To connect your website, we create a secret key. You can use that key to connect your website.
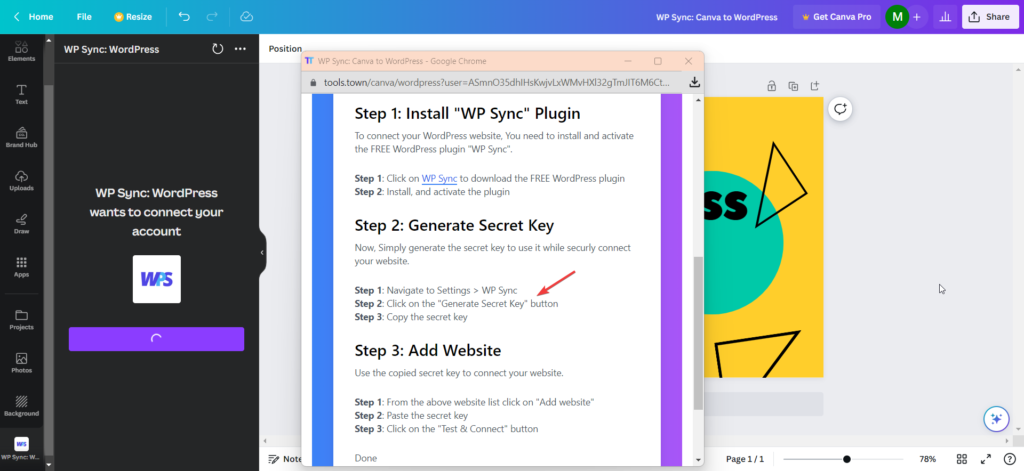
To create a secret key:
- Go to Settings > WP Sync
- Click on “Generate Secret Key” button

You’ll see the secret key in the popup below:
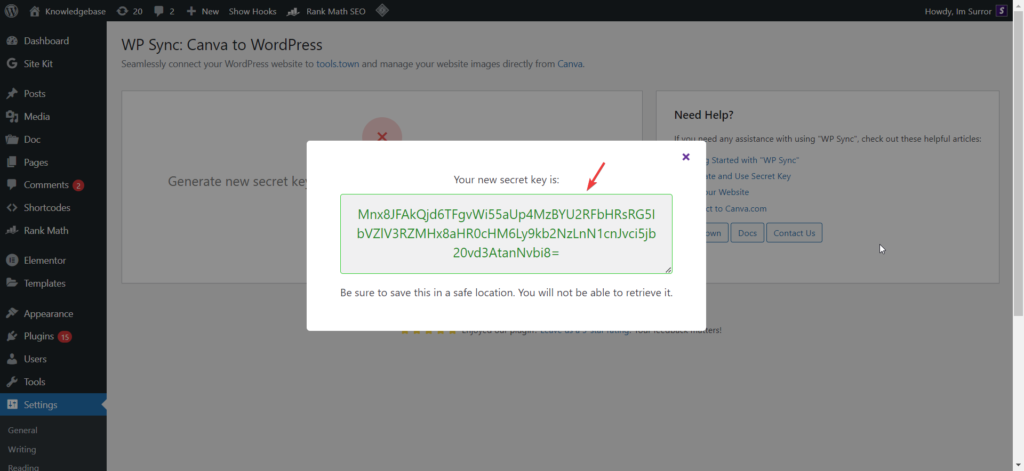
Note: Copy that secret key. If you close the popup then you’ll not see the secret key later.
If somehow, you forget the secret key or do not copy it to the clipboard then don’t worry.
You can simply create a new key on click on the “Re-generate Secret Key” button.
Top ↑Connect Website Connect Website
Once you create a secret key, Then you are able to add your website.
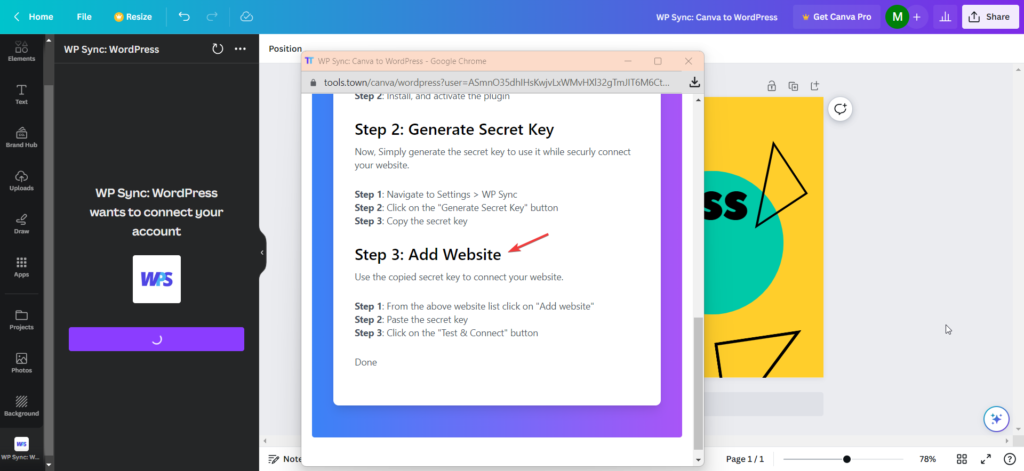
To add the website just click on “Add website” button as below:
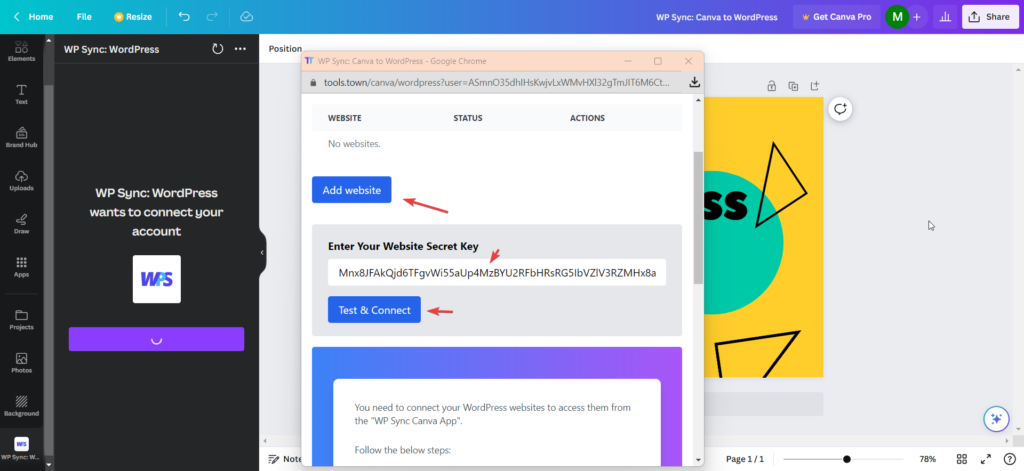
Here,
- Click on “Add website”
- Paste the Secret key
- Click on “Test & Connect” button
If getting an error something as below:
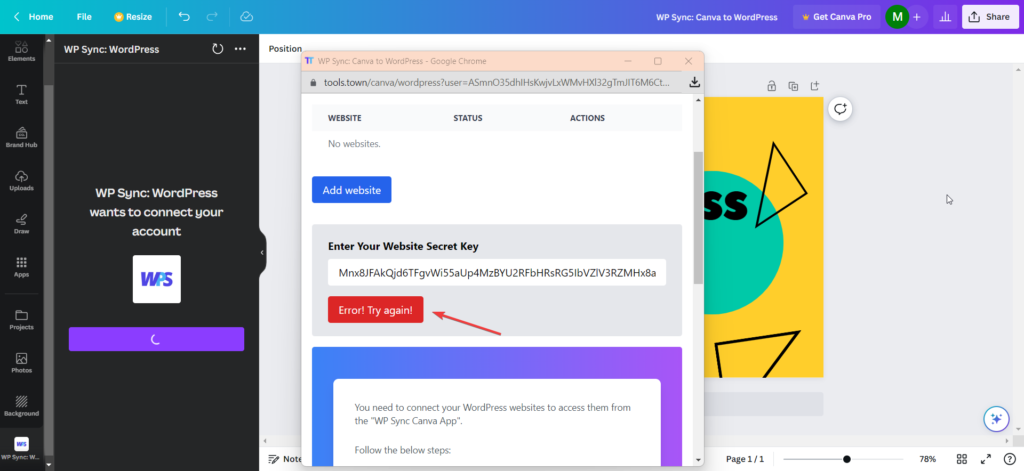
Then, Just click again on the “Try again” button.
If there are no errors then, You’ll see the site is connected screen as below:
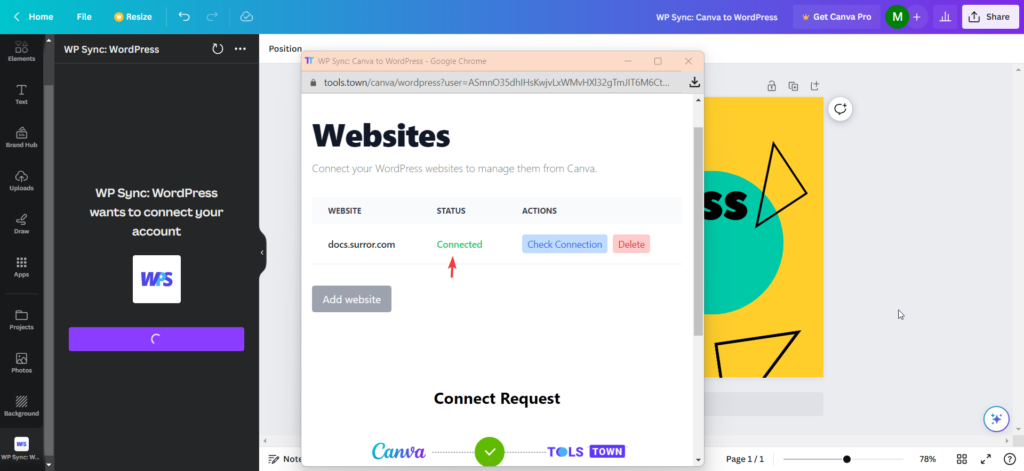
Connect to Canva Connect to Canva
Now, You have added the single website and connected sucssfully to the Tools.town.
Now, You need to connect to the Canva.
Just scroll down, You’ll see the screen as below:
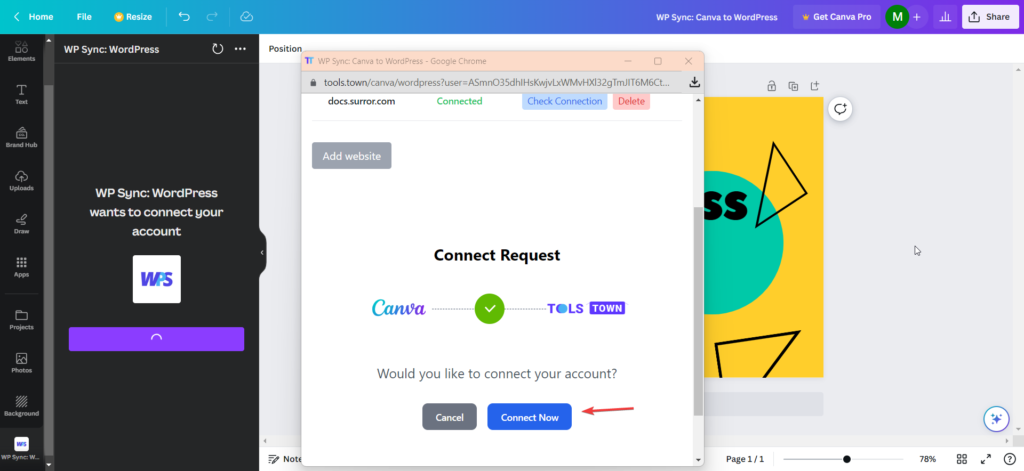
Click on “Connect Now” button.
If due to heavy traffic you see the screen as below then just click refresh as below:
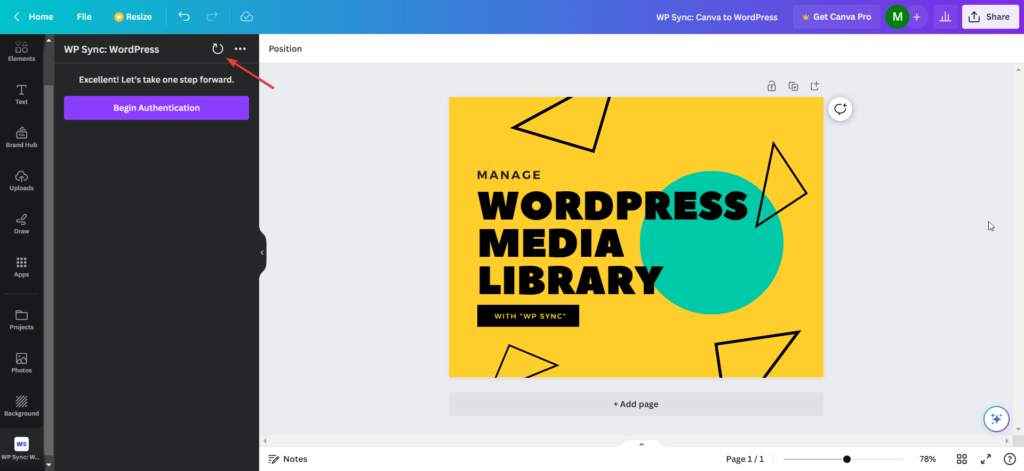
Great! You have successfully connected your website to the Canva.
You can see the screen as below:

Manage from Canva Manage from Canva
Now, your website is connected. You can manage the images from Canva.
Let’s see how.
Top ↑Design the Image Design the Image
Before export, you need to design your image in Canva.
Once the image is ready then you can:
- Upload the image to your connected website.
- If already uploaded, then you can update the image as well
- Set featured image for post
- Set featured image for page
- Set featured image for product (with paid subscription)
- Set featured image for custom post type (with paid subscription)
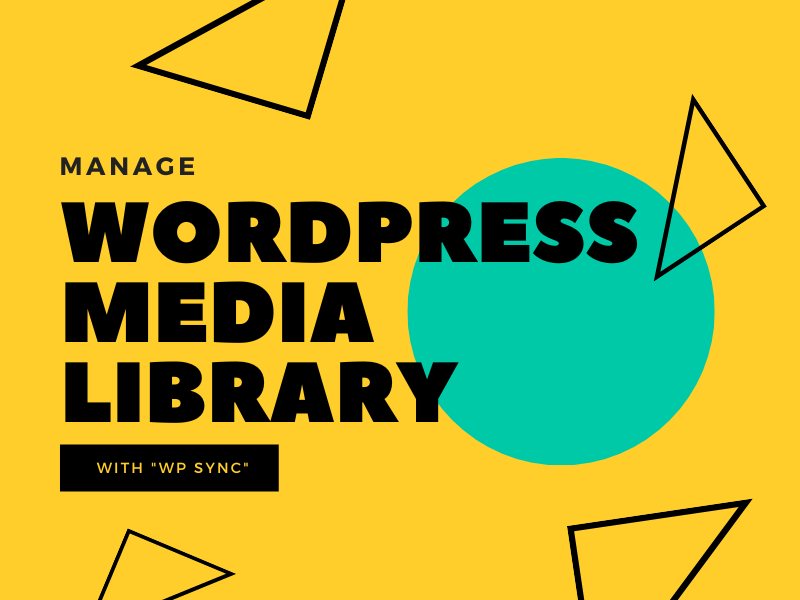
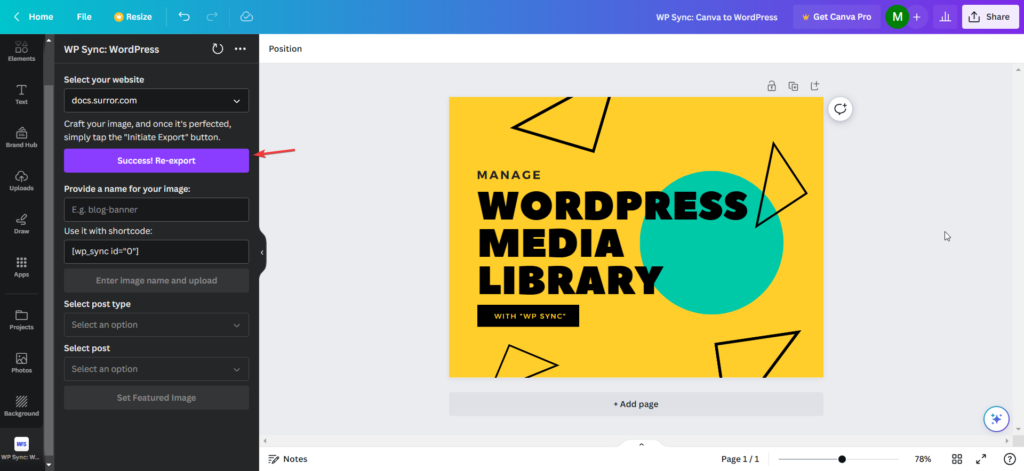
In this demo, I have the below image designed in Canva.
Now, I have connected website https://docs.surror.com/ website.
And, want to upload it on the connected website https://docs.surror.com/
Top ↑Initiate Export Initiate Export
Click on the “Initiate Export” button to export the image:

If you are a Premium user of Canva then you can export the image with Canva provided options.

Done. Your image is now ready to upload to the WordPress website.
Upload New Image Upload New Image
As we have just created the new image which is not exist on our website https://docs.surror.com
So, The image will first upload to the website.
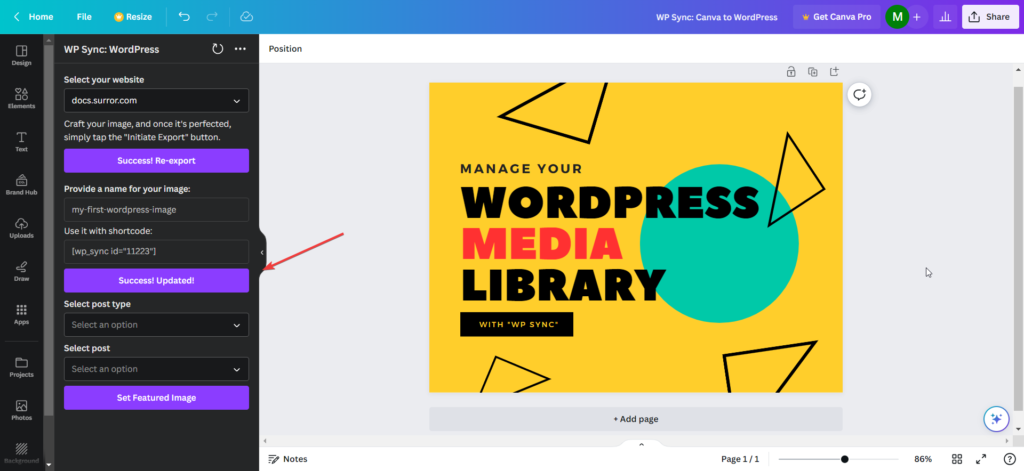
Before uploading the image, you need to enter the image name:

After adding image name the “Upload image” button will be visible:
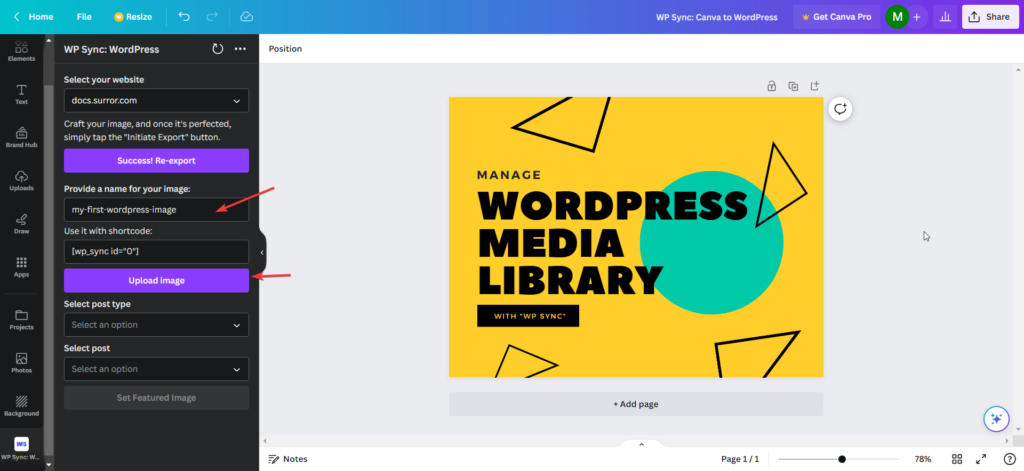
Here, I have named my image as “my-first-wordpress-image”.
Now, the “Upload image” button is enabled.
Just click on it.
Done. You’ll see the screen something as below:

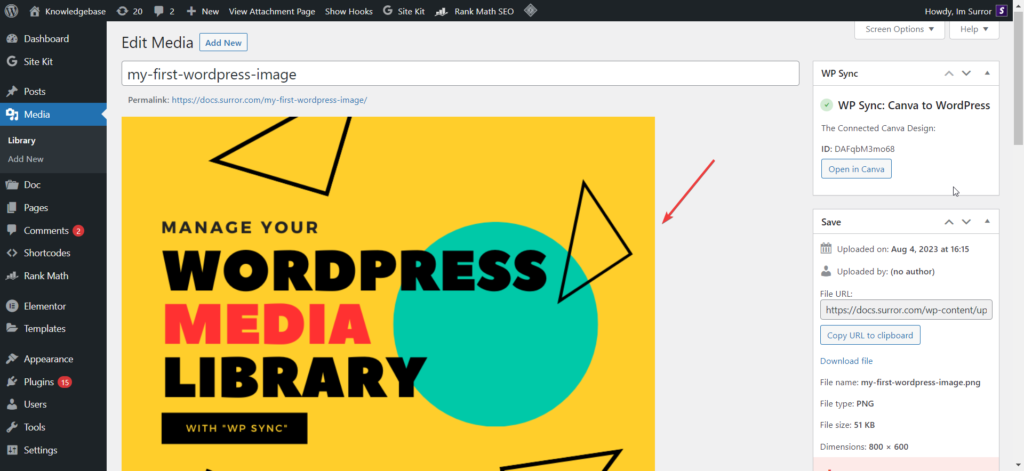
As we uploaded the image to the https://docs.surror.com.
So, In the connected website media library we can see the uploaded image as below:
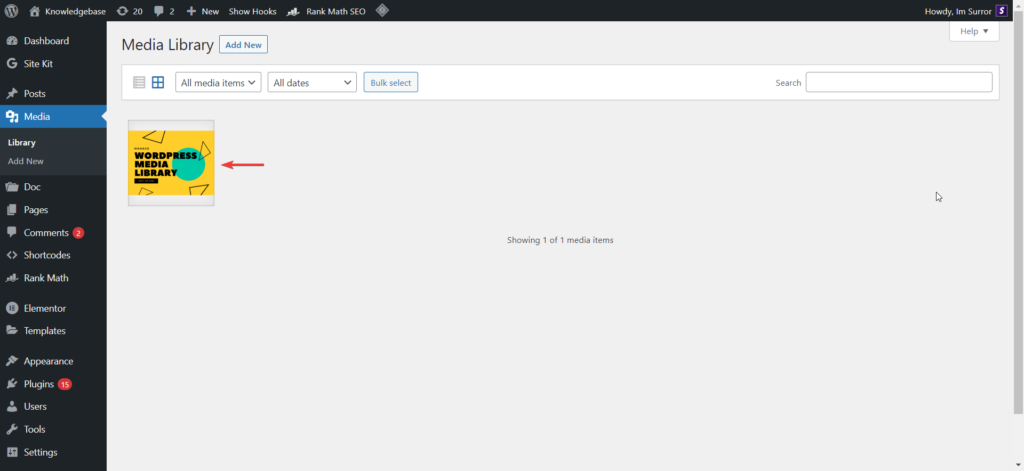
Here, I have connected my website https://docs.surror.com/ so, in my website media library I can see the uploaded image.
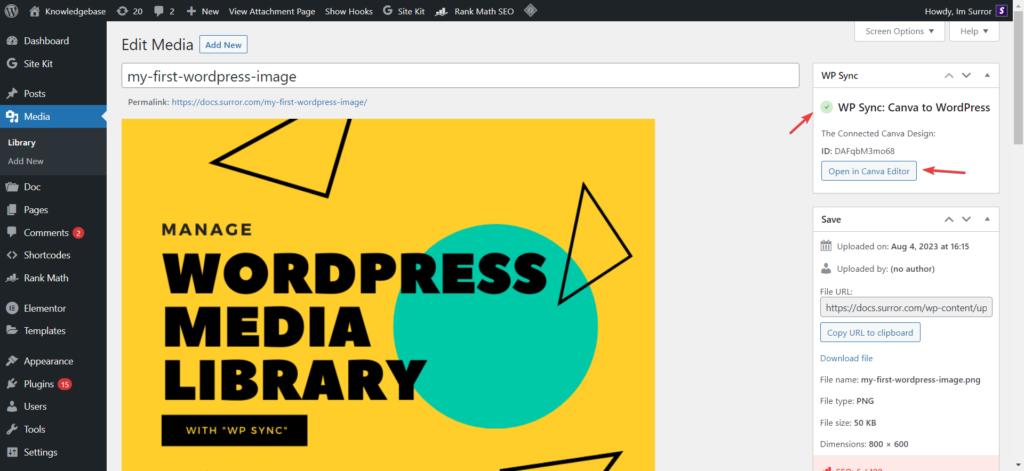
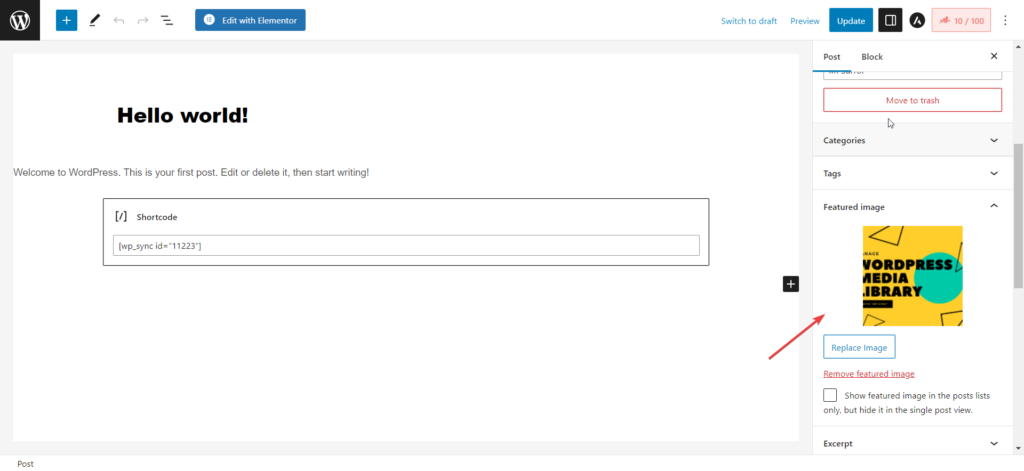
Go to edit the image by clicking on “Edit more details” link:

You can see the connected Canva design:
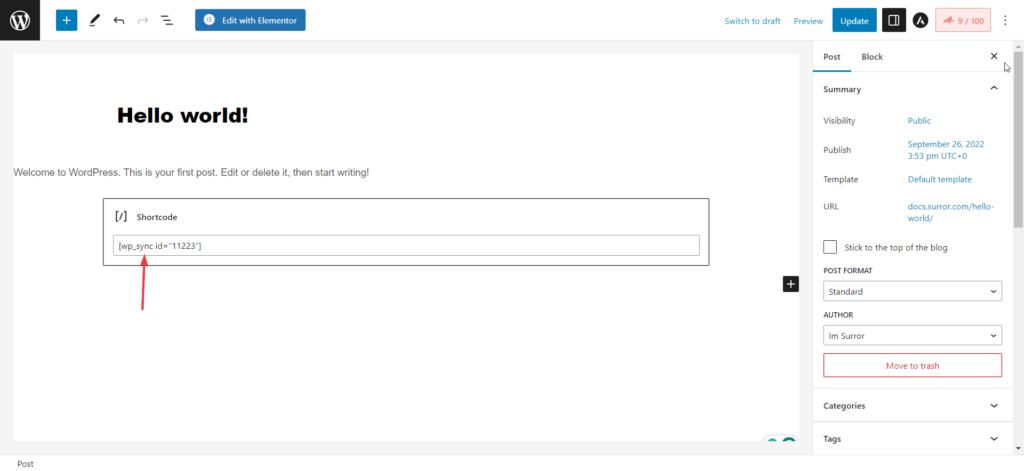
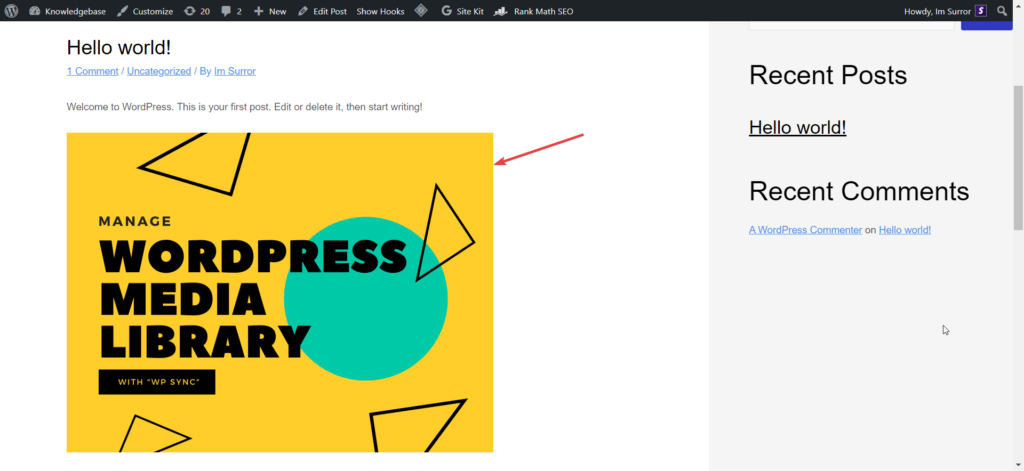
Use the shortcode Use the shortcode
You can also use the shortcode to display the image anywhere as you want.
E.g.

I have added the shortcode into the page:
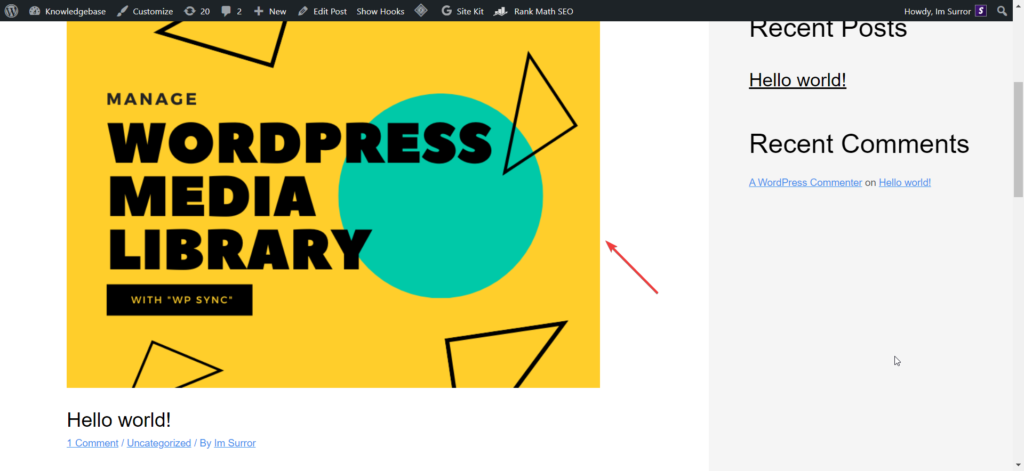
On front end you can see the image as:
Set as featured image Set as featured image
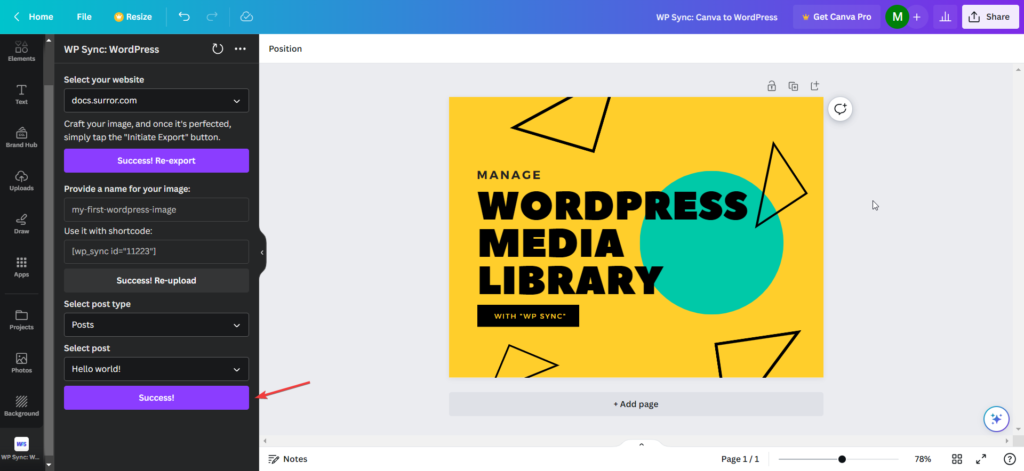
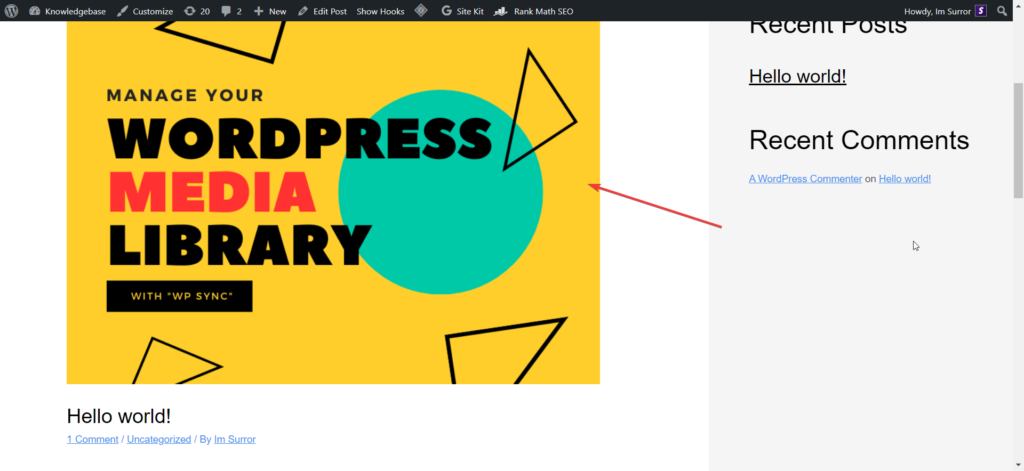
Now, I want to set the featured image to my “Hello World” post.
Currently, I don’t have the featured image:
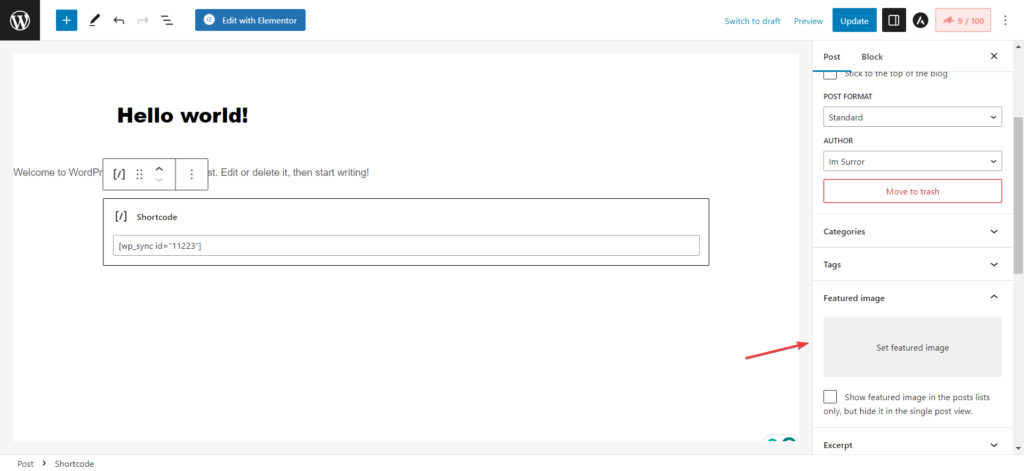
To set the featured image, Go to Canva and follow:
Select post type

As, I want to set it to the featured image so selected the post type as “Posts”.
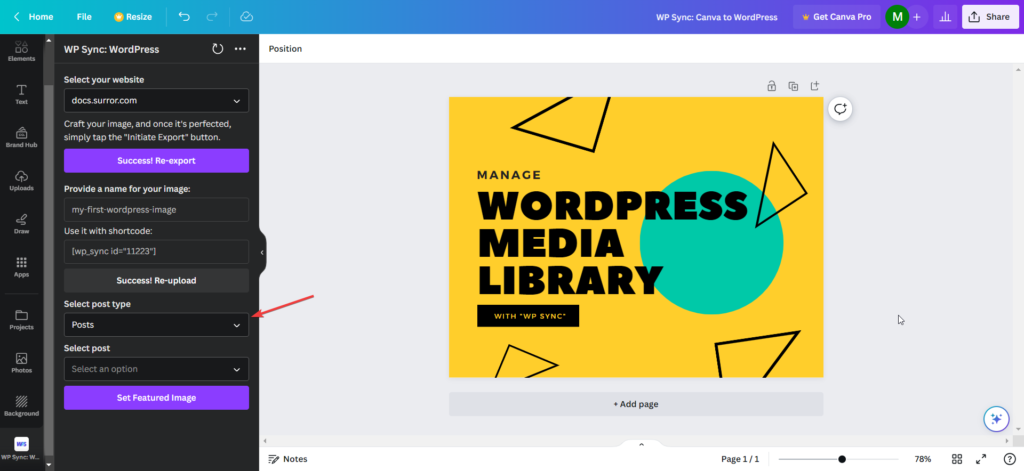
2. Select the post

That’s it.
Now, click on the “Set Featured Image”

Done. You can see the success message as below:
Now, refresh the Hello Page and I see the image is set as the featured image.
I can see the featured image on front end as well:
Update Image Update Image
Now, Its interested part. You have already exported the image. But want to update the image design.
You can simply do the changes into the image and update the existing connected image.
How, See below steps:
Top ↑Edit existing image Edit existing image
II have made changes I’m my design as:
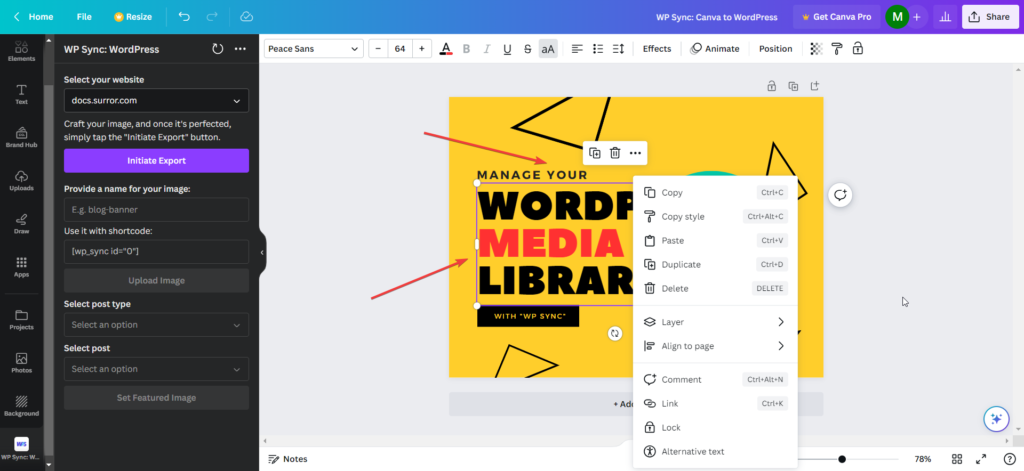
For example, I have just added one.
Top ↑Initialte Export Updated Image Initialte Export Updated Image


You can see the image status at:

Update Image Update Image
You can see:

Now just click on “Update Image” button.
You’ll see the image update success at:
The image is directly updated from your WordPress website.
We can see the featured image for the Hello World post was also updated with new design.
Have any questions or need further help? Contact us